Like this article? Support us by subscribing here. Your donation will help us continue to provide quality-of-life news and make local impact possible.
By Caitlin Justensen, Radcliffe Home Designs
Halloween decorating does not have to mean plastic skeletons and bright orange décor. For a look that feels a little more timeless, try creating your own Victorian-inspired silhouette portraits. They are inexpensive, easy to customize, and add just the right amount of spooky charm to a mantel, entry table, powder room, or gallery wall.
Better yet, this is a project the entire family can participate in.
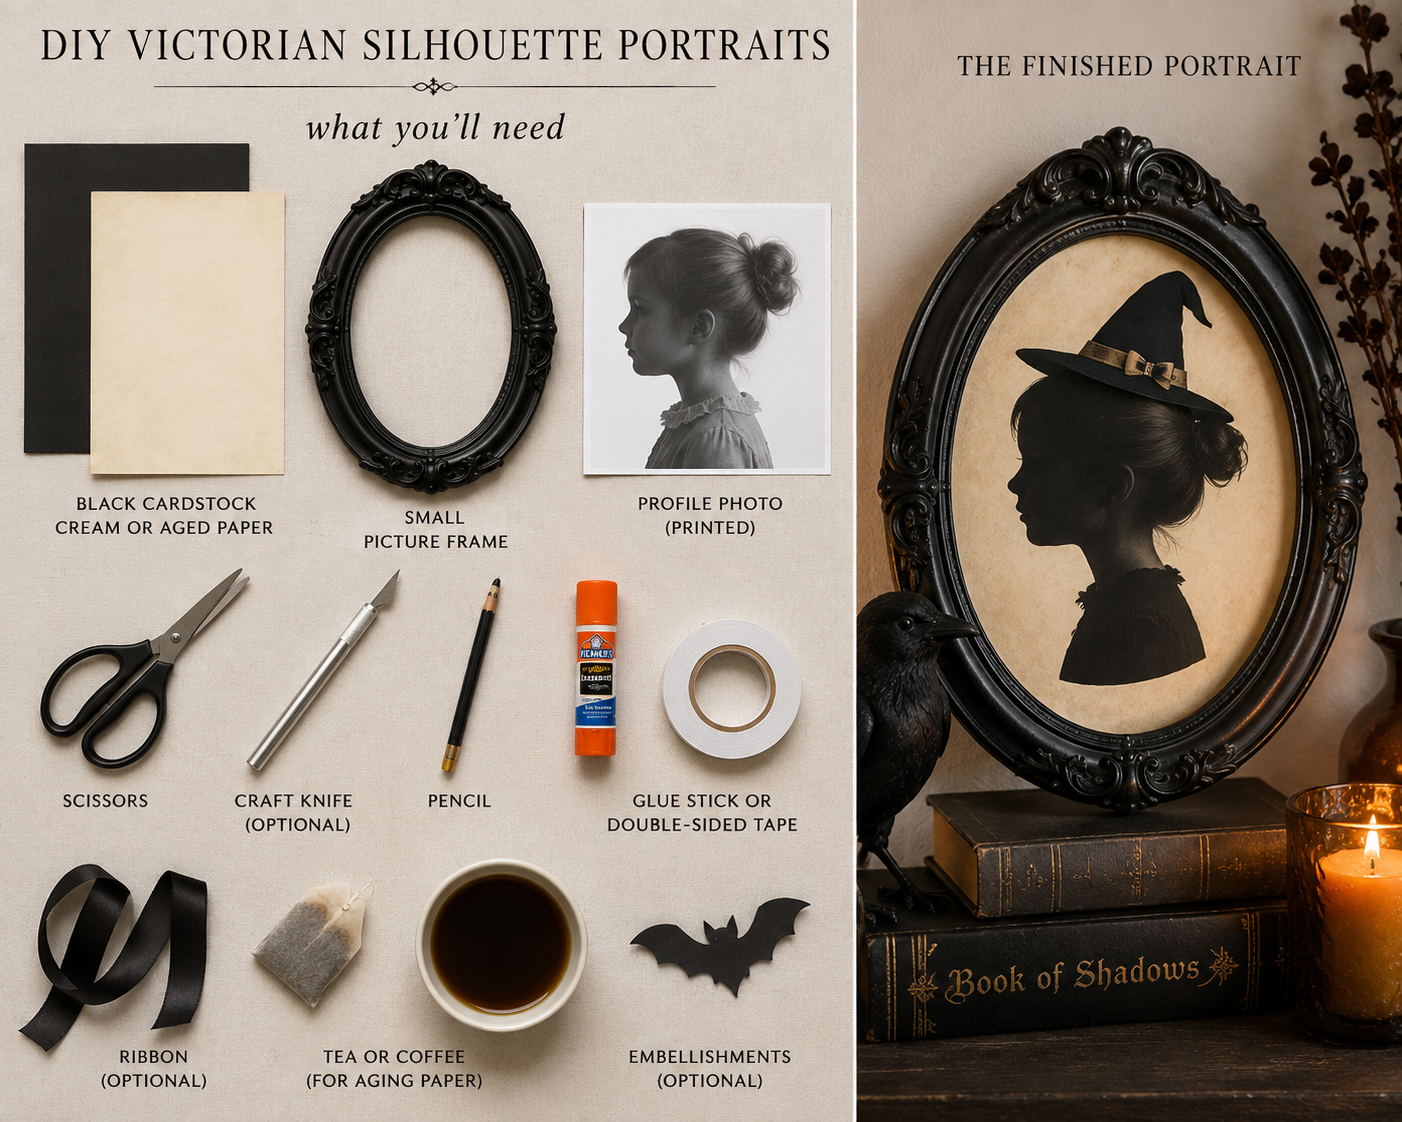
What You’ll Need
- Black cardstock or heavyweight construction paper
- Cream, ivory, or aged-looking paper
- Small picture frames
- Scissors or a craft knife
- Pencil
- Glue stick or double-sided tape
- Printer or smartphone camera
- Optional: ribbon, antique-style frames, tea or coffee for aging paper
Step 1: Take a Profile Photo
Have your subject stand sideways against a plain wall. Take a clear photograph of their profile, making sure the outline of the forehead, nose, lips, chin, and hair is easy to distinguish.
For pets, treats can be very helpful in encouraging them to look in one direction long enough for a photo.
Step 2: Print and Trace
Print the profile photo at a size that fits your chosen frame. Cut around the outline of the face and head to create a template.
Place the template onto black cardstock and trace around it lightly with pencil.
Step 3: Cut the Silhouette
Carefully cut along the traced line. Small scissors work well for most designs, while a craft knife can help with finer details.
Do not worry about making every strand of hair perfect. Strong, recognizable shapes actually create the most traditional silhouette effect.
Step 4: Create the Background
Mount the black silhouette onto cream or ivory paper.
For an aged appearance, lightly brush the paper with cooled tea or coffee and allow it to dry completely before attaching your silhouette. Slight imperfections only add character.
Step 5: Add a Halloween Twist
This is where the project becomes especially fun. Add subtle details such as a tiny witch hat, bat, Victorian collar, raven, spider, or pointed cat ears.
The key is restraint. One unexpected detail gives the portrait personality without turning it into a novelty decoration.
Step 6: Frame and Display
Place each finished silhouette into a frame. Antique-inspired gold, black, or dark wood frames are especially effective, but thrifted frames painted in coordinating colors work beautifully as well.
Display several together to create a Halloween “family portrait” gallery, or place individual portraits throughout your home.
Halloween décor is often at its best when it feels collected rather than purchased all at once. A handmade project like this adds personality, history, and humor to your home—and unlike many seasonal decorations, these portraits can come back out year after year.